
Resin art is taking the creative world by storm, captivating artists and hobbyists alike. With its stunning glossy finish and endless design possibilities, it’s no wonder people are eager to dive into this medium. If you’ve ever dreamed of transforming your artistic skills or simply want a new way to express yourself, resin art offers the perfect canvas for exploration.
But where do you start? That’s where resin kits come in. Designed with beginners in mind, these starter kits provide everything you need to embark on your creative journey. From vibrant pigments to molds and tools, they simplify the process of creating breathtaking artwork without overwhelming newcomers.
Whether you’re looking to create beautiful coasters for your home or unique gifts for friends, getting started with resin art has never been easier. Join us as we explore how a resin art starter kit can unlock your potential and elevate your crafting game!
Benefits of Using a Resin Art Starter Kit
A resin art starter kit is a fantastic way to dive into this captivating medium. With everything you need bundled together, it removes the guesswork from your creative journey.
These kits typically include high-quality resin and hardener, which ensures consistent results every time. You’ll also find vibrant pigments and additives that allow for stunning color combinations.
Convenience plays a key role too. No more hunting for individual supplies or worrying about compatibility—everything is designed to work seamlessly together.
For beginners, having clear instructions included can be invaluable. They guide you through the process step-by-step, making it easier to achieve beautiful results right away.
Plus, using a starter kit can help you develop essential skills without feeling overwhelmed. As you practice with different techniques, you’ll build confidence in your artistic abilities while discovering what truly excites you about resin art.
Step-by-Step Guide for Creating Your First Resin Art Piece
Start by gathering all your materials. You’ll need resin, a hardener, mixing cups, stir sticks, and pigments or dyes for color.
Next, prepare your workspace. Lay down protective coverings on surfaces. Make sure you have good ventilation; safety first!
Measure the resin and hardener according to the instructions on your kit. Pour them into a mixing cup and blend thoroughly for at least three minutes. Scrape the sides of the cup to ensure an even mix.
Once mixed, add any colors or glitter you desire. Stir gently to avoid bubbles but thoroughly enough to get vibrant hues.
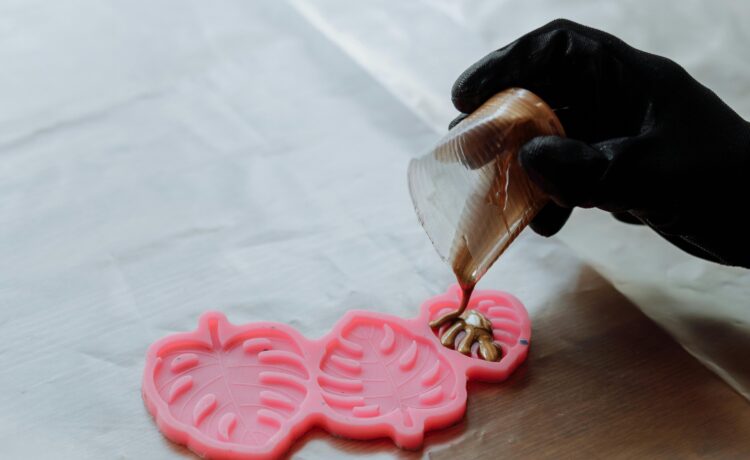
Now it’s time to pour! Carefully layer your mixture into molds or onto surfaces you’ve chosen. Let it sit undisturbed as it cures—this can take several hours depending on product specifics.
After curing is complete, remove your piece from its mold and enjoy showcasing your new artwork!
Inspiration and Ideas for Future Projects
Exploring resin art opens up a world of creativity that knows no bounds. Once you’ve mastered your first piece, the possibilities become endless. Here are some inspiring ideas to ignite your imagination.
Consider creating personalized coasters as gifts for friends and family. You can embed photos or meaningful objects within the resin, making each set unique. Another popular project is designing vibrant wall art using different color techniques and textures. Think about layering colors or incorporating glitter for added depth.
For those who enjoy functional pieces, try crafting custom jewelry like pendants and earrings. Resin allows for intricate designs while remaining lightweight and durable. And if you’re feeling adventurous, explore geode-inspired creations with beautiful crystal-like finishes.
Seasonal decorations can also be an exciting avenue to pursue—think resin ornaments during the holidays or themed centerpieces for special occasions. For pet lovers, consider embedding paw prints in a keepsake piece.
Don’t forget about experimenting with different molds! From trays to keychains, there’s a mold available for nearly every idea you might have in mind.
As you continue on your journey from novice to artist with resin kits by your side, let your imagination flow freely and remember: every piece tells its own story waiting to be discovered through your unique lens.
Tips and Tricks for Working with Resin
When working with resin, preparation is key. Always ensure your workspace is clean and well-ventilated. Cover surfaces to prevent spills and protect your surroundings.
Use a digital scale for accurate measurements. Mixing resin and hardener in the right ratio ensures optimal curing. An imperfect mix can lead to sticky or cloudy results.
Temperature matters too. Resin cures best at room temperature, ideally between 70°F to 75°F (21°C to 24°C). If it’s too cold, consider warming your materials gently before use.
For bubbles that may arise during mixing, try using a heat gun or torch after pouring. A gentle pass over the surface will help them rise and pop without disturbing your design.
Always wear gloves when handling resin; it protects both you and the artwork from unwanted residues. Embrace these tips as you refine your skills on this creative journey!


